
How to Use Windows’ File History to Back Up Your Data in Just 3 Steps
In Windows 10, there exists a backup program that is both quick and easy, and as long as you know how to plug in a USB external drive, then you will only be a couple of steps away from having your precious data backed up safely on your external drive.
Backing up your data can be a nightmare for some people, they do not know where to start. This tutorial is aimed at the novice, who needs a helping hand to setup an easy backup system in just minutes. The backup as instructed in this tutorial will backup your own user folder and all sub folders and files, which includes: Documents, Photos, Videos, Music, Favourites and all other folders located under your user name folder. It is important to note this backup process does not backup files and folders on other areas of your hard drive, outside of your group of user folders.
Step 1 - Plug in your Backup Drive
The first thing you will need to do is have an external hard drive, or a large capacity USB memory stick, you will need to plug this into your computer, and note the drive letter that Windows assigns to your backup drive device (your hard drive or USB drive). When you plug in your drive, a window will pop up, and this will tell you what the drive letter is that has been assigned to your backup drive, make note of this.
Step2 - Open File History (in Control Panel)
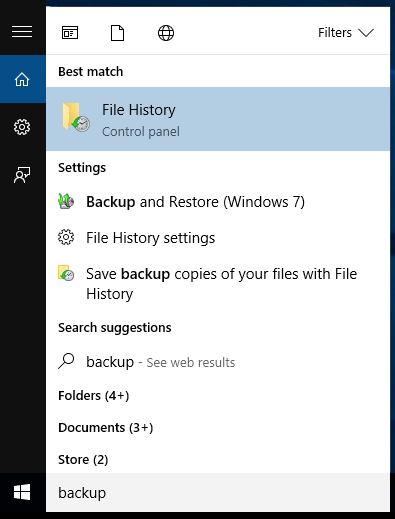
You will need to open File History, the easiest way is to simply start typing the work 'backup', and the Windows Menu on your computer will pop up with the 'Best Match', simply click on 'File History' - example screen print shown below:
Step 3 - 'Turn On' File History
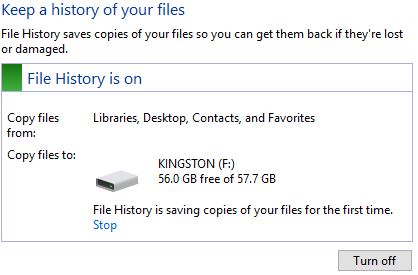
Once your click on the box on the lower right of the 'File History' window, that says "Turn On", your computer will immediately start backing up your data, see our example screen print below, showing you what your File History window looks like.

Once 'turned on', your setup of your backup is complete, you will see a Pop Up Window as shown below, advising your File History is turned on, and will tell you "File History is saving copies of your files for the first time". Unless you go into "Advanced Settings" and make changes, your backup will occur once every hour that your computer is turned on. For more options, and information, please continue with this tutorial below.
What does 'File History' Backup
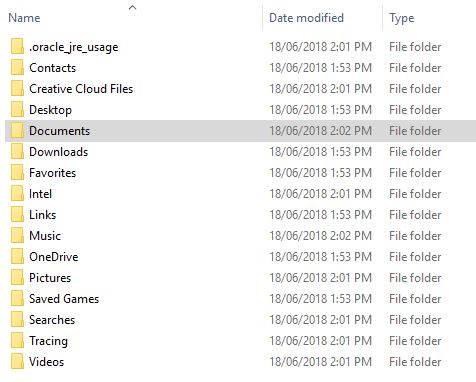
Simply put, 'File History' copies only your own files, within your own 'User Profile'. It will do a simple copy of all your user profile folders and files, from your profile folders stored under: c:\users\<your user profile name>\ to your backup drive. Below is an example of the typical folders that are found under a user profile, that will be backed up by File History:
File History Advanced Settings
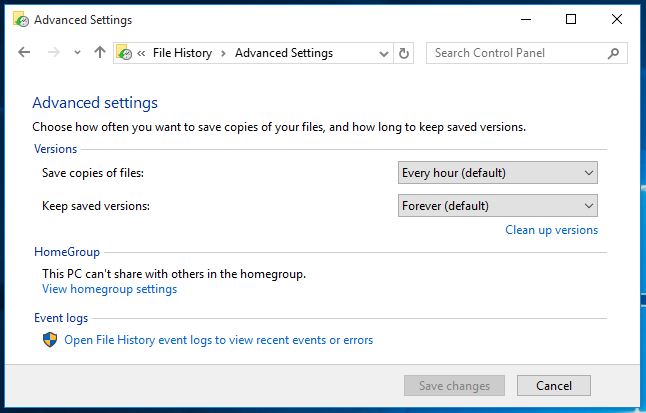
You can refine settings for 'File History, by clicking on 'Advanced Settings' under the File History Window. In this feature you can change the frequency of backing up your files, and the length of time to keep saved versions of your files. The defaults are shown below, however, you may click on these to change them to whatever may suit you. It is important to note that if you have files that you modify regularly, then File History will keep a copy of each and every version of your file(s) indefinitely unless you change settings in this screen. If you have a large capacity backup drive, we recommend you leave settings at the default. However, if your space is limited you will need to consider changing settings in this area to save on space.
How to Clean up Old Backups
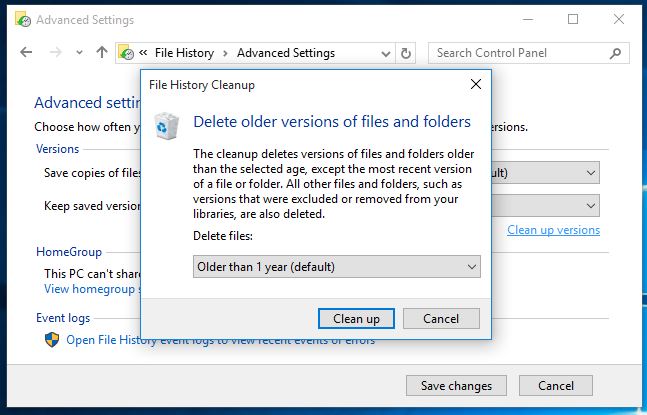
If you find your backup drive is full, and need to clean up the drive to create more space, then the 'File History Cleanup' under 'Advanced Settings' in 'File History' is a good option, if you did not want to buy a larger capacity backup drive.
Simply click on 'Clean up version', and select the time frame to which you are happy to delete older versions of the same files - then click on 'Clean Up'. Note this is only deleting older versions of the same file. This may create enough space on your backup drive to continue with your backups.
This concludes our Tutorial on how to Backup your Data in Windows 10.
If you are experiencing computer issues, or maybe your start menu is not displaying or is freezing, then it is time to seek some help.
Email using our "Contact Form", or call us direct on 07 3821 6200 during business hours for a chat about your needs, and an obligation free quote.
Business Hours: 8.30 am to 5.00 pm Monday to Friday
Servicing all Redlands Suburbs: Alexandra Hills, Birkdale, Capalaba, Cleveland, Mount Cotton, Ormiston, Redland Bay, Sheldon, Thorneside, Thornlands, Victoria Point, Wellington Point